Learn what filters are and how to use them effectively.
Filters in Loyalistic are a way to search for contacts. You can think of a filter as a saved collection of search conditions. You define a filter once, and after that you can use it whenever you need. Using filters, it is easy to for example target your newsletter to specific audience, based on virtually any piece of information associated with contacts.
Creating and managing filters
A filter needs to be defined, before you can use it. The create a new filter, do the following:
- Go to Settings / Filters.
- Create a new filter by clicking the New filter button. A new window opens.
.png)
- Give your filter a name.
- Add some conditions. A filter must have at least one condition. The first condition box has conditions which all must be met (i.e. "AND" condition). The second box contains conditions of which at least one must be met (i.e. "OR" condition). You can see an example below. A condition consist of three (3) parts:
- Field: e.g. Language, Score, Organization name or even an email address.
- Comparison: e.g. "is equal to", "is greater than" or "starts with". Which comparisons are available for selection depends on the field selected.
- Value: the value to be compared with. This can be any text (most fields), a number (Score), or a predefined value (Consents, Contact status, Language).
- See how your filter is working by clicking the Preview button. This will list max. 10 contacts which match your filter conditions. If no contacts are shown in the preview table, then your conditions are too strict.
- When you are happy with your new filter, click on the Save button to save it for later use.
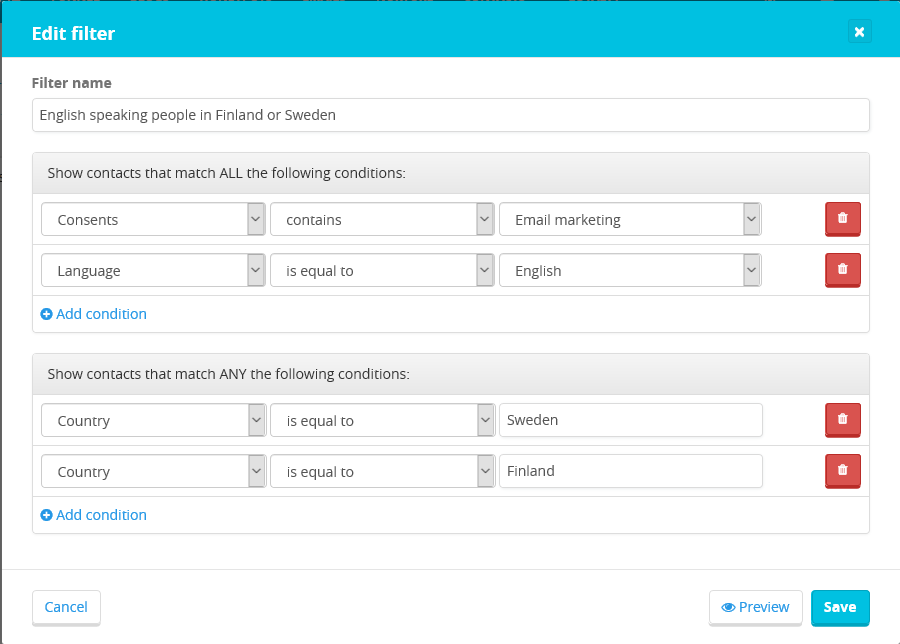
For demonstration purposes, let's imagine we wish to find people who a) speak English, b) have given their consent to marketing and c) live either in Finland or Sweden. We can then define the conditions as follows:
- The contact's language is English, AND
- the contact has given their consent to marketing AND
- the contact's country is either
- Finland OR
- Sweden
The filter would then look like this:
You can edit a filter whenever you need and the changes will take place immediately after saving.
Using filters
You can use the filters when sending email. To target the email using a filter, do the following:
- Create or modify an email by going to Emails and then either edit an existing email or create a new one.
- On the right-side column, select the list(s) containing the contacts you wish to send the email to.
- Under lists, there is a drop-down box, called Filter. Select the filter you wish to use.
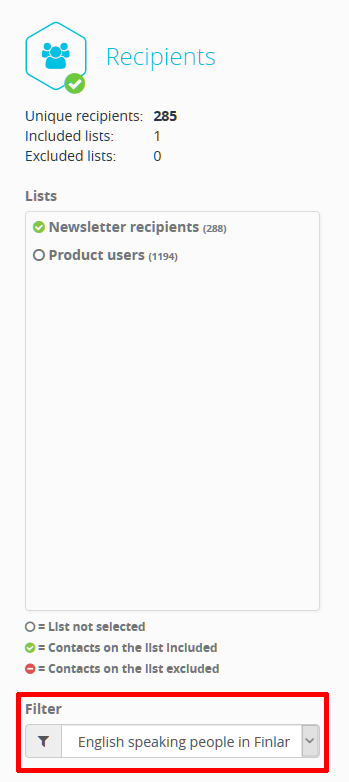
- The Unique recipients count updates to reflect the changes you made. In this example, the target list contains 288 contacts, but we use filter to remove some contacts, so that the email will be sent to 285 contacts.
- Remember to save the changes.